Radio DIY kit: Two vacuum tubes medium wave AM tuned RF receiver 1-V-1 with electronic tuning
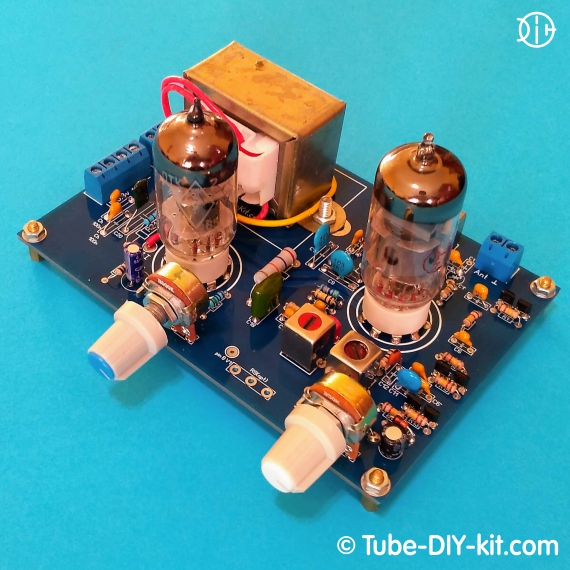
The two vacuum tubes medium wave AM tuned RF receiver 1-V-1 provides a loud-speaking signal reception from local and far-away powerful radio stations by the external antenna. Current consumption: The board size: 131 x 91 mm.
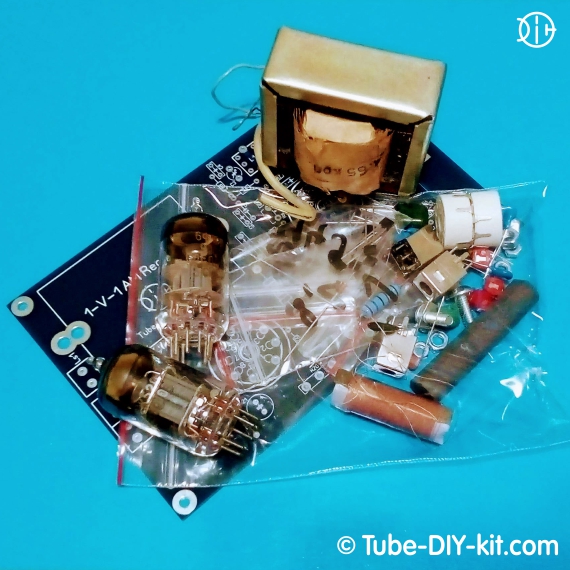
The set is supplied as a printed circuit board and a kit of parts.
It is possible to purchase the set without the 6F12P , 6J52P (6J11P) vacuum tubes and/or the output transformer.
Instructions for assembling and tuning the device:
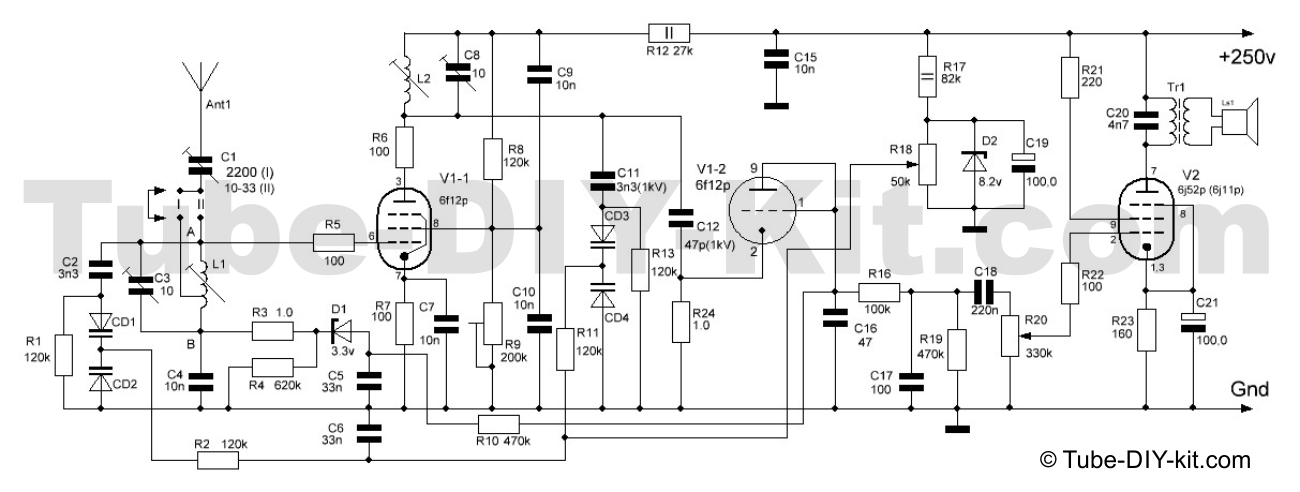
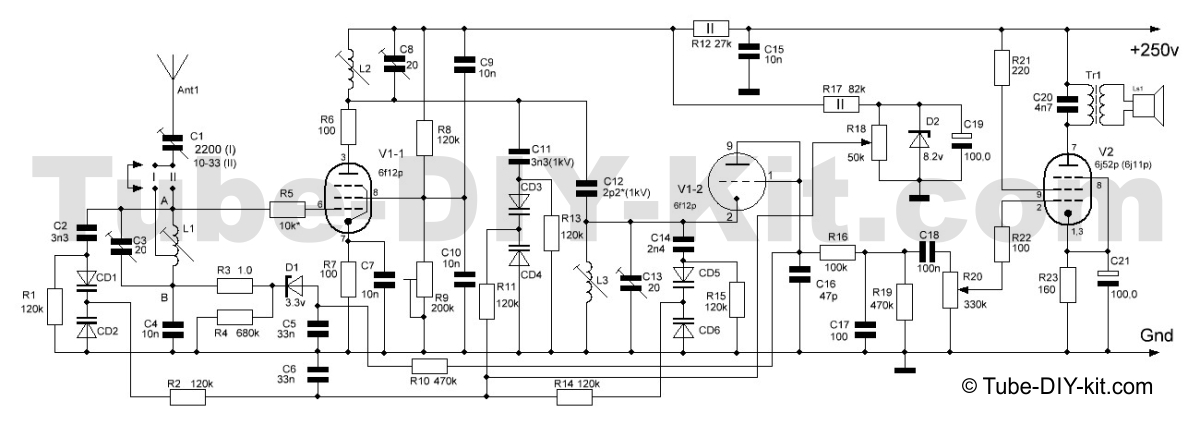
The optional kit allows you to assemble a 1-V-1 radio receiver in a simple way with two coils (pic.1) or in a harder way with three coils (pic.2). We recommend trying both of them starting with the easier one.
By default, the tube 6J52P (6J11P) is supplied in the construction set but it is possible to use an E810F tube instead. To do this you need to remove the pin #6 from the tube panel in a way to exclude contact with the board.
We recommend using the ferrite (magnetic) antenna (MA) only in the area of reliable reception of powerful local radio stations. In other cases use the red shielded coil that is supplied with the set. We should notice that the usage and setting of a receiver with an MA is harder than with a shielded coil in the reception. The unevenness of the gain by the diapason and the spurious connection between high-frequency circuits and the MA will have to be compensated by a manual setting. There is a spot on the board for the manual adjustment potentiometer R9(opt). The R9 resistor and should not be installed on the board but the R9(opt) outlet should be connected with the #8 V1 tube pin.
Cut off the main board brackets. They will be required to mount the ferrite antenna. Install the board and solder the details according to the scheme and board marking. While installing the electrolytic capacitors make sure the polarity is right. The filter capacitors marked on the board as Ch are not indicated on the scheme but are recommended to be installed if the receiver works with extraneous power supplies. In our power supplies, such capacitors are already installed.

pic. 1
After assembling the circuit, insert the brackets into the board end and solder them there. Install the kernel of the magnetic antenna in the holes of the brackets and solder the MA coils. After assembling the circuit, connect anode and heater voltage from the power supply. A properly assembled receiver starts working immediately but a high-frequency gain setting, the circuit pairing, and range setting will have to be set. It is recommended to control the consumption of electricity by the anode cables during turning on the device for the first time. The number should not be more than 30mA. In case of exceeding this level of consumption pick denomination R23.
Wait until it gets dark - the medium-wave range will be available. Connect the antenna to the "Ant" terminal. Turn on the receiver and turn the set resistor R9 all the way to the right guided by the maximum air noise. Turn the R18 tuning potentiometer to the leftmost position and try recepting a radio station from the lowest part of the range. Moving the magnetic antenna coil on the rod (turning the input coil core L1) and try to accept stations in the lower part of the range. Сhecking it with the monitoring receiver. Then by turning the L2 core and decreasing the R9 gain achieve the maximum volume without letting the receiver self-excitation.
Now turn the R18 to the rightmost position and do the same thing with a radio station from a high-frequency range part. This time you have to set the the C3 and C8 trimmers. Repeat the procedure 2 or 3 times. If the receiver is self-excitation in any part of the range the with the help of the R9 decrease the overall gain until the self-excitation are gone. Have you already paid attention to the varieties of the input circuit and communication antenna with the circuit? Try them out and find the best combination for your antenna by soldering the jumpers on the board.
The next thing we should do is improving the sensitivity and the selectivity of the receiver. To do this, remover the R24 resistor and referring to pic.2 install the L3 coil and its setting circuits on the board. Pay attention to the R5 resistor in the V1-1 tube circuit. This is not a mistake - its face value is greatly increased in comparison with pic. 1.

pic. 2
The setting of the more difficult variant has little differences from the one that was described above. The only thing is that now we have to achieve the pairing of three coils instead of two. This is a more painstaking task but your efforts will be rewarded by a significant improvement in the work of the receiver.
* An external antenna is required! You can use a Mini Whip antenna instead.


